
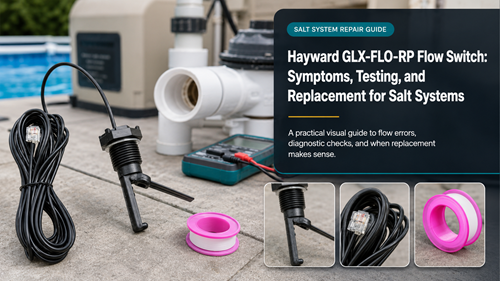
The Hayward GLX-FLO-RP Flow Switch is a safety input that tells a compatible salt system whether adequate water flow is present. When the controller reports no flow, the switch may be faulty, but it is only one part of the flow path and should not be the first component replaced automatically.
Start outside the control box: confirm that the pump is primed, valves are open, the filter is not heavily restricted, return flow is normal, and the cell plumbing is full of water. Never bypass a flow switch to force chlorine production; the safety interlock exists for a reason.
Hayward GLX-FLO-RP Flow Switch Symptoms
A no-flow indicator that stays on after circulation is established is the classic complaint, but intermittent warnings can also occur when pump speed is marginal, a filter is dirty, or a valve position changes water velocity through the switch.
Hayward’s official AquaRite troubleshooting manual explains the AquaRite no flow warning and provides a manufacturer sequence for checking circulation and the switch.
Do Not Diagnose From The Display Alone
Feel for normal return flow, check the filter pressure trend, inspect the pump basket, verify water level, and make sure automation has not reduced pump speed. Correct real hydraulic problems before evaluating the sensor.
Rule Out Real Low Flow First
A flow switch cannot create water flow. If circulation is weak, replacing the switch may hide the actual maintenance problem for a short time or fail to change the warning at all.
For Hayward flow sensor testing, use the current Hayward manual for the installed control platform and keep electrical-panel work with a qualified technician.
| Observation | Check | Possible Cause |
|---|---|---|
| Weak return jets | Pump, baskets, filter, valves | Actual low flow |
| Good flow but warning | Switch orientation and condition | Sensor or installation issue |
| Warning only at low RPM | Variable-speed pump setting | Flow below switch threshold |
| Intermittent warning | Air, debris, loose connection | Unstable flow or switch |
| No display or power | Control system | Not primarily a flow-switch symptom |
Safe Flow-Switch Checks
Turn equipment off before handling the external switch or connector. Inspect the visible cable for cuts, crushing, sun damage, or strain and check that the arrow or orientation matches the manufacturer installation direction.
A model-specific part page is the right starting point for GLX-FLO-RP replacement steps, but installation should still follow Hayward documentation for the exact system.
Never Bypass The Safety Input
Do not jumper, short, or defeat the switch to keep chlorination running. Bypassing a safety device can allow the cell to energize without proper water flow and can create hazardous conditions.
Cable And Tee Replacement Fit
If the symptoms remain after hydraulic checks, compare the exact salt system flow fault replacement listing with the installed connector and control platform.
Measure the routing distance without stretching the cable across sharp edges or hot equipment. Extra cable should be secured neatly rather than cut or spliced unless the manufacturer explicitly permits it.
A replacement sold with a 15-foot flow switch cable can be compared with the existing cable path before ordering.
If the switch threads into a tee, include a visual flow switch tee inspection for cracks, cross-threading, leaks, and correct orientation rather than replacing only the sensor blindly.
After-Replacement Verification
- Restore normal pump flow
- Check for leaks around the tee
- Confirm the cable is protected
- Start the pump before chlorination
- Allow the controller to recognize flow
- Verify the no-flow warning clears
- Check cell production status
- Observe at normal and low pump speeds
- Recheck after filter pressure changes
If a new switch does not clear the warning while water flow is clearly adequate, stop replacing parts. The control board, connector, wiring, or system configuration may need professional diagnosis.
Hayward GLX-FLO-RP Flow Switch Ownership Records
Keep a simple service record for the Hayward GLX-FLO-RP Flow Switch: installation date, pool volume, salt test results, output setting, pump runtime, cleaning dates, warning lights, diagnostic readings, and any replacement parts. A seasonal record makes it easier to distinguish gradual component wear from a sudden chemistry, flow, or configuration problem.
When performance changes, compare the new readings with the last period when the pool was stable. That history is more useful than replacing several parts at once, and it gives a pool professional better evidence if advanced electrical or controller diagnosis is needed.
Also record major seasonal changes such as unusually hot weather, a new pump schedule, filter service, heavy swimmer use, or a chemistry correction. Those events can change chlorination behavior without indicating hardware failure, and they make future replacement decisions more evidence-based.
Frequently Asked Questions
Does a No Flow light always mean the switch is bad?
No. Dirty filters, valve position, low pump speed, air leaks, and blocked circulation can all reduce real flow.
Can I bypass the flow switch to test the chlorinator?
Do not bypass a safety interlock. Use the manufacturer diagnostic procedure or a qualified technician.
Why does No Flow appear only at low pump speed?
The water velocity may fall below the switch threshold. Review pump speed, filter condition, and plumbing before replacing the switch.
Does cable length matter when ordering a replacement?
Yes. Confirm the specified replacement cable and route it without stretching, cutting, or unsafe splicing.
What if a new switch does not fix the problem?
Verify actual flow again, then have the connector, control board, and related circuitry diagnosed by a qualified professional.
